
Lighting Ballasts Explained
Jun 17, 2025
Introduction
A lighting ballast prevents the lights from burning out or failing.
It controls the flow of power, especially in fluorescent and HID lamps.
In this guide, you will find out what a ballast does, what type you need, and how to solve some common problems.
What Is A Lighting Ballast?

For a gas discharge lamp, a lighting ballast is a device that regulates the electric current.
Made without, the current may become excessive for the lamp, resulting in burnout.
It is like a water tap restricting flow: the current so regulated maintains the proper working condition of your lights.
Basic Definition
In simple words, the ballast provides an adequate voltage to start the lamp and then limits the current after it is turned on.
Think of it as a traffic cop for electricity.
A fluorescent or an HID light requires a high voltage for push when starting.
It requires a low, steady current after ignition.
The ballast provides both of these functions.
What It Does In A Light Fixture
Without a ballast, your lighting fixture is incomplete, unless it's an LED fixture.
A ballast helps the following processes:
● Provides enough voltage to start the lamp
● Limiting of current so that heat is not produced excessively
● Stabilizes arc discharge between electrodes, which is light from inside
● Energy Saving and Promoting Lamp Life
Some lamps do not even work without it.
Common Types Of Lights That Use Ballasts
Not all bulbs need one.
But these do:
● Fluorescent Tubes (T5, T8, T12)
● Compact Fluorescent Lamps (CFLs)
● High-Intensity Discharge (HID) Lamps
● Metal Halide, Mercury Vapor, and Sodium Vapor Lamps
If your bulb flickers or hums, chances are that there's something wrong with the ballast.
Why Ballasts Matter
Let's stay with unwanted hardware: ballasts are an absolute necessity for certain lighting systems.
This is why they matter:
● Prevents lamp damage due to electrical surges
● Improves efficiency by wasting less power
● Safe operation for commercial and residential lighting
● Prevents electrical fires or overheating
Because without the right ballast, a great light bulb is useless--or worse, a hazard.
Lighting Ballast Basics Table
| Component | Purpose | Applies To |
|---|---|---|
| Start Voltage | Ignites the gas in the lamp | Fluorescent, HID |
| Current Limiting | Prevents overcurrent once lamp is lit | All ballast-driven systems |
| Stabilization | Keeps light consistent without flickering | Fluorescent, HID |
| Compatibility | Matches specific bulb specs | T5/T8/T12, HID, CFL |
How Does A Ballast Work?

A ballast is like an intelligent gatekeeper for your lamp.
It starts the light, controls the current, and stabilizes the operation.
Without it, the light either would not turn on or it would instantly destroy itself.
Let us break down how a ballast works, step-by-step.
Controlling Current Flow
Gas-discharge lamps have no built-in resistance.
After they conduct electricity, they want to draw more and more current-until they burn out.
This is where the ballast comes in.
The ballast keeps the lamp from drawing excessive current.
It stands like a resistor or a regulator and keeps the current on the safe side.
Think of it this way:
● The lamp wants to drink from a firehose.
● The ballast reduces the flow to a stream.
Ballast And Lamp Startup
A fluorescent or HID lamp needs high voltage when it first starts up.
That spike in voltage has two effects:
● It ionizes the gas within the lamp; and
● It starts an electric arc between the electrodes.
It is the arc that produces the light.
Once the arc forms, the lamp no longer needs high voltage.
It just needs steady current, and the ballast switches modes to provide that.
Preventing Lamp Overload
Now it starts to get dangerous.
Without a ballast, the lamp would continue pulling more current as it gets hotter.
That can cause:
● Excessive heating;
● Early failure; and
● Fire hazard.
The ballast regulates the current flow.
In fact, some electronic ballasts can detect when the lamp is about to fail and switch themselves off.
Pretty nifty, isn't it?
Circuit Stability Role
Ballasts also stop flicker and voltage spikes.
They smooth the electric flow and keep brightness constant.
The electronic ones do this at even higher frequencies (20kHz or more).
High-frequency operation:
● Lowers flicker
● Improves energy efficiency
● Stabilizes light output
If your light is flickering, buzzes, or turns off at random—the ballast could be unstable or dying.
Operation Summary Table for Ballast
| Stage | What Ballast Does | Why It Matters |
|---|---|---|
| Startup | Sends high voltage to ignite lamp | Starts the light quickly |
| Arc Stabilization | Regulates arc current | Prevents overload |
| Constant Lighting | Maintains power at set level | Ensures brightness, avoids flicker |
| End-of-Life Mode | Shuts down or blinks faulty lamp | Safety and equipment protection |
Bonus Insight: AC vs DC Behavior
Ballasts are normally used with AC current.
But some special lighting systems (inverter or solar-powered setups), DC ballasts may prevail.
They do the same regulating the startup and the flow, only being designed for constant polarity.
Type of ballast should be therefore ideally adjusted to the power source.
Types Of Lighting Ballasts
Not all ballasts are created equal.
Depending on your type of light and setup, you have to pick a specific one.
Let's walk through the main types of lighting ballast and their workings.
Magnetic Ballasts
They are the old ballasts, big, heavy, simple, and clunky.
They consist of coils of copper wire wound around an iron core.
Now, as the AC current flows through the coils, the ballast produces some kind of magnetic resistance.
This magnetic resistance restricts the current and supplies a high voltage kick to start the lamp.
Features:
● It operates at low frequency (60 Hz)
● Visible flickering is usually caused
● Buzzing noise is caused when in operation
● Energy consumption is comparatively larger
● One could find magnetic ballasts in the older:
● T12 fluorescent fixtures
● HID street lamps
● Industrial lighting systems
They are sturdy, but obsolete now.
Electronic Ballasts
That would make them the modern ones, slim, quiet, reliable, and efficient.
Instead of magnets, electronic ballasts use semiconductor circuits to control voltage and current.
They take in 60 Hz power and convert it to high-frequency AC—often 20,000 Hz and above.
Features:
● Near-silent operation
● No visible flicker
● Shorter lamp startup time
● More energy efficient
Further, they generate less heat and often support configurations involving multiple lamps.
You'll normally find these in:
● T5 and T8 fluorescent lighting
● Modern CFLs
● Some HID fixtures
Many are self-regulating nowadays and are dimmable.
Hybrid Ballasts (Cathode-Driven or Trigger Start)
They have magnetic cores with electronic ignitors.
Also known as "electromagnetic hybrid ballasts", they work a little bit between the old and the new.
Current control is magnetic, yet electronic circuitry is used for the lamp startup.
Features:
● Faster startup than full magnetic
● Works with older fluorescent bulbs
● Lower cost than full electronic models
They are much less present in homes anymore but are still around in commercial retrofit.
Ballast Compatibility With Light Types
Let’s match the right ballast to the right lamp:
| Lamp Type | Compatible Ballast(s) | Notes |
|---|---|---|
| T12 Fluorescent | Magnetic, Hybrid | Being phased out, not energy efficient |
| T8 Fluorescent | Electronic (preferred) | Quieter, better light quality |
| T5 Fluorescent | Electronic only | High efficiency, compact design |
| CFL (non-integrated) | Electronic | Often built into the fixture |
| HID (MH, HPS, MV) | Magnetic or Electronic | Use based on power requirements |
| LED Tubes | None (if ballast-bypass) | Some need ballast removed completely |
Ballast Type Confusion
Two types of tubes are named: those that say they are “ballast compatible” and those that are “ballast bypass.”
Always go for good package reading.
Crossing the wrong ballast with the wrong lamp might damage the bulb or even make it loose.
Electronic vs Magnetic Ballasts
The two types of ballasts are totally different from one another in the way each controls electrical current.
That was fast. If you are confused about: One is which one I have? Or which one should I require?
What is The Main Difference?
● Magnetic ballasts use copper coils and magnetic fields
● Electronic ballasts use transistors and circuits
One is old school (and bulky), the other is modern (and smart).
Both start the lamp and regulate the power, but the manner in which each does it really differs, and so does the effectiveness.
Efficiency And Energy Use
And that is basically where the electronic stands tall.
Magnetic:
● Runs at 60 Hz (standard line frequency)
● Wastes more energy as heat
● Lower power factor
Electronic:
● Runs at 20,000+ Hz
● Reduces energy waste
● Often ENERGY STAR® rated
If you're trying to cut your electric bill, go electronic.
Noise And Flicker
That annoying hum from the old-style light fixtures? It's the magnetic ballast humming.
Magnetic:
● Vibrations are audible during operation
● Can cause visible flicker, especially when recorded by cameras
● Unsuitable for sensitive locations (offices, video shoots)
Electronic:
● Silent from further away
● No flicker visible to the naked eye
● Better for your eyes and your sanity
If it exists in a workplace or school, flickering causes headaches. Electronic ballasts put an end to that.
Size And Heat
Magnetic ballasts: big, heavy, and hot.
Electronic ones: small and cool-running.
| Feature | Magnetic Ballast | Electronic Ballast |
|---|---|---|
| Size | Larger, heavier | Smaller, lightweight |
| Heat Output | High | Low |
| Installation | May require brackets | Fits easily in most fixtures |
Environmental Impact
Old magnetic ballasts may contain PCB (a material prohibited from use since the late '70s).
Newer ones, still, are not very ecologically acceptable.
Electronic ballasts do not contain hazardous materials.
In fact, they are easier to recycle.
Disposal Tips:
● Check labels for "No PCBs"
● Follow e-waste rules when discarding
● Many cities will take your ballast to recycling centers
Which Should One Use?
Use Electronic Ballasts When:
● To gain better energy efficiency
● Retrofitting from T12 to T8/T5 lamps
● A requirement of lesser flickering and noise
Would like to have dimmable or smart lighting controls
Use Magnetic Ballasts When:
● For replacing in an older system
● If the lamp only supports magnetic start
● For HID systems that are incompatible with electronic models
Quick Comparison Table
| Feature | Magnetic Ballast | Electronic Ballast |
|---|---|---|
| Frequency | 60 Hz | 20 kHz or more |
| Noise | Yes (buzzing) | No |
| Flicker | Yes | No |
| Energy Efficiency | Low | High |
| Startup Speed | Slower | Faster |
| Size & Weight | Larger | Compact |
| Compatibility | T12, HID | T5, T8, CFL |
So, unless you’re using a legacy system, electronic ballasts are the better choice in nearly every way.
Ballast For Fluorescent Lights
Fluorescent lamps must have the proper ballast to work.
The type of ballast depends on the kind of lamp, its starting procedure, and the nature of the fixture.
Here is a kind of a handy crash course so you never go wrong on this.
Fluorescent Tubes That Use Ballasts
There are three tube types you will mostly encounter:
● T12 – Old style, fat tubes (1.5-inch diameter)
● T8 – Slimmer (1-inch diameter), more energy-efficient
● T5 – Slimmest (5/8 inch), for new-age commercial fixtures
Each type requires a different ballast.
Using it incorrectly will cause flickering, dim light, or no light.
Difference Between T8 and T12 Ballasts
This is the kind of basic incompatibility, even though they might look similar.
T12 ballasts are usually magnetic.
They have a higher wattage per tube (40W).
Very slow to start and makes too much buzzing.
They are now being phased out.
T8 Ballasts are always electronic.
Low-wattage (32W or less).
Start instantly.
Producing more lumen per watt.
Once a pro tip: When changing from T12 to T8, also change the ballast.
They operate on different voltages and also have different pin configurations.
Instant Start vs Rapid Start Ballasts
Two common starting methods are built into ballasts:
Instant Start:
● Immediately sends high voltage.
● Fast lamp ignition, no warm-up.
● Shorter lamp life.
● More efficient (used in offices and commercial buildings).
Rapid Start:
● Preheats lamp electrodes.
● Lower voltage start-up.
● Longer lamp life.
● Slightly less efficient.
Which should you buy?
If you want fast ON without any flicker, buy an instant start.
If you're going to be keeping that bulb longer, buy a rapid start.
Common Applications For Fluorescent Ballasts
| Application | Preferred Lamp Type | Recommended Ballast Type |
|---|---|---|
| Offices | T8 or T5 | Instant Start Electronic |
| Classrooms | T8 | Rapid Start Electronic |
| Garages | T12 (older setups) | Magnetic (legacy only) |
| Commercial Retail | T5 | High-Efficiency Electronic |
| Grow Lights | T5 HO | Programmed Start Ballast |
Things Worth Checking When Looking For A Replacement Ballast
If you seek to purchase a new fluorescent ballast, here's what you must take care of:
● Lamp Type (T5, T8, T12)
● Number of Lamps (1, 2, 3, or 4 per ballast)
● Voltage Rating (usually 120V or 277V)
● Start Type (Instant, Rapid, or Programmed)
● Dimming Support (if needed)
Always match your new ballast to the lamp specs.
Guesswork could either blow the ballast or burn the bulb.
Fluorescent Ballast Matching Table
| Lamp Type | Common Wattage | Ballast Type | Start Method |
|---|---|---|---|
| T12 | 40W | Magnetic | Rapid or Preheat |
| T8 | 32W | Electronic | Instant/Rapid |
| T5 | 28W–54W | High-Efficiency Elec | Programmed Start |
Mistakes in Ballast Compatibility Not to Make
T8 lamp in T12 ballast? Will not start.
Wrong voltage? May damage the fixture.
Wrong starting type? Will considerably shorten the life of the lamp.
Overdrive lamp? May void warranty.
Always double-check your fixture label with ballast specs.
If in doubt, just bring the old ballast with you to the store, or snap a picture.
LED Ballast Bypass
Converting an existing fluorescent lighting setup to LED will probably introduce you to the term “ballast bypass.”
It seems very convoluted, but in reality, it is about only one thing:
Getting rid of the ballast when it is no longer needed.
Let me describe it to you, to help you decide if a ballast bypass setup is right for your lighting designs.
What is Ballast Bypass?
An LED ballast bypass is exactly what it sounds like: it removes or disconnects the existing ballast and wires the LED tube directly to the line voltage (usually 120V or 277V).
Gone is the ballast, and all the extra components. Straight power is fed into the LED tube.
Why Do LEDs Work Without Ballasts?
LEDs work without needing a high voltage to be turned on. They do not need a ballast to regulate current- they have built-in drivers to achieve this.
In fact, the ballast can:
● Waste power
● Reduce lifespan of LEDs
● Induce flickering or even causes failure if it goes bad
Now, bypassing the ballast will get rid of these possibilities and make the circuits simpler.
Types Of LED Tubes And Their Compatibility
Before you start cutting wires, check your LED tube type.
There are three main categories:
| Tube Type | Ballast Required? | Notes |
|---|---|---|
| Plug-and-Play (Type A) | Yes (uses existing ballast) | Easiest to install, but depends on ballast type |
| Ballast Bypass (Type B) | No | Requires rewiring, but more reliable |
| Hybrid (Type A+B) | Optional | Works with or without a ballast |
Most installations performed commercially prefer the Type B tubes (ballast bypass) for enhanced long-term reliability and efficiency.
How To Safely Perform A Ballast Bypass
A very basic stepwise method:
1. Turn power off at the breaker.
2. Remove the cover from the ballast on the fixture.
3. Disconnect the wires from the ballast.
4. Reconnect the line and the neutral wires directly to the sockets (refer to wiring diagram that accompanied your LED tubes).
5. Cap any unused wires safely.
6. Install the new LED tube.
7. Turn on the power and test.
Caution: These steps require keeping electrical work in mind. If not completely confident, please hire a professional electrician.
Safety Considerations
● Follow LED tube instructions strictly.
● Some require non-shunted sockets-Check before install.
● Incorrect wiring may cause short or electric shock.
● Always mark the fixture as "ballast bypass" for future work.
Why Ballast Bypass Is Worth It
Here is why many pros now recommend it:
● Lower energy consumption
● Fewer components to fail
● The LEDs' long lifespan
● Simpler maintenance
This, being a one-time wiring job, pays in years of trouble-free lighting.
LED Ballast Bypass Summary Table
| Feature | With Ballast (Type A) | Ballast Bypass (Type B) |
|---|---|---|
| Ballast Dependent | Yes | No |
| Energy Efficiency | Moderate | High |
| Maintenance | Requires ballast checks | None |
| Installation | Easy (no wiring) | Requires rewiring |
| Long-Term Cost | Higher | Lower |
Ballast Replacement Guide
Does flickering happen to your lights? Are you hearing an intermittent buzzing buzz? Maybe some lamps simply refuse to come on?
Chances are the ballast is in question.
With daylight, some tools, and a bit of wiring know-how, replacing a lighting ballast is quite easy.
This guide has step-by-step instructions.
Signs You Need To Replace A Ballast
Before breaking out your tool set, confirm the ballast is really the source of all trouble.
Here is how to tell:
● Lamps flicker but do not give their full light
● The fixture makes an abnormal buzzing sound once it has been switched on
● The lamps glow dimly or just take too much time to start
● The lamps work intermittently
● Burn marks or melted wire insulation are evident
● When checked with a multimeter, the output wires show either no continuity or erratic voltage
Any of these signs mean it's time to get a new ballast.
Required Tools
● Phillips and flat-head screwdrivers
● Wire strippers and cutters
● Voltage tester or multimeter
● Wire nuts (connectors)
● Electrical tape
● New compatible ballast
● Ladder, if required, for ceiling fixtures
Ensure that your new ballast is compatible with your lamp type, voltage, and fixture setup (T8, T12, 120V, 277V, etc.).
Step-By-Step Ballast Replacement Instructions
1. Turn off Power
Always start by shutting off power at the circuit breaker.
Use a voltage tester to ensure no current is there at the fixture.
2. Remove Fixture Cover
Pop off the lens or metal cover.
There you will see the lamps, wires, and ballast.
3. Remove Fluorescent Tubes
Rotate and slide them out carefully; set them aside safely.
4. Open Ballast Compartment
Take out the metal ballast cover using a screwdriver, usually found through the middle.
5. Disconnect the Ballast
Cut or unscrew wires connecting the old ballast.
Label or photograph first if you aren't sure of the layout.
6. Install the New Ballast
Secure the new ballast with screws or clips.
And then connect wires by color using wire nuts:
Black (line) to black
White (neutral) to white
Blue, red, or yellow wires to lamp sockets (follow your wiring diagram)
Some ballasts can be wired to 1, 2, or 4 lamps- consult the schematic with your ballast.
7. Clean Up and Test
Tuck the wires behind the ballast.
Replace the ballast cover.
Reinstall the lamps, turn the power back on, and test the fixture.
If the lights turn on immediately and quietly, you have done a great job.
Important Safety Tips
Never work with live wires; you must double-check with a tester.
Don't reuse wire nuts or damaged wiring.
If your ballast contains PCBs (older magnetic types), get rid of it at a proper recycling center.
Never force parts that don't fit together because a mismatched ballast is a fire hazard.
Ballast Replacement Overview Table
| Step | Task Description | Tools Needed |
|---|---|---|
| 1. Power Off | Shut off breaker and verify | Voltage tester |
| 2. Disassemble | Remove fixture cover and lamps | Screwdrivers |
| 3. Access Ballast | Open housing to expose wiring | Screwdriver |
| 4. Remove Old Unit | Cut wires, unscrew ballast | Wire cutters |
| 5. Wire New Ballast | Match colors and secure connections | Wire strippers/nuts |
| 6. Test And Finish | Power on and confirm light operation | Multimeter (optional) |
Extra tip: While upgrading, why not consider the LED switch?
Maybe consider this instead of a ballast replacement if:
● Your fixture is too old
● You want lower electric bills
● You want longer-lasting bulbs
Lighting Ballast Troubleshooting
Not all lighting issues are caused by the bulb.
A bad ballast can cause buzzing, flickering, dim light, or perhaps no light at all.
This section will facilitate the diagnosis of any given ballast problem without guesswork or unnecessary replacement.
Common Symptoms Of A Failing Ballast
Observe for classic symptoms before testing:
| Symptom | Possible Cause |
|---|---|
| Flickering light | Bad ballast or worn bulb |
| Delayed start | Weak ballast or wrong type |
| Buzzing noise | Aging magnetic ballast |
| No light output | Dead ballast or wiring issue |
| Blackened sockets | Overheating ballast |
| Lamps glow dimly | Incorrect voltage or mismatch |
If one or more of these occurs, the ballast could be going bad, especially with new bulbs whose installation is correct.
How To Test A Lighting Ballast
No need for a lab. Just certain tools and five minutes' time.
What You Need Inside Your Toolbox:
● Digital multimeter
● Screwdriver
● Non-contact voltage tester
● Safety gloves
Steps To Test A Ballast
1. Turn Off Power
Shut down power at the breaker. Double-check using a voltage tester.
2. Open The Ballast
Take the cover off the fixture, pull out the tubes, and open the wiring compartment.
3. Visual Inspection
Look out for:
● Swollen casing of the ballast
● Burn marks
● Loose wires
● Melted insulation
4. Examine Voltage Output
If safe, turn back the power briefly; check if the voltage is being sent from the ballast to the sockets using a multimeter.
No voltage means it is dead.
Some voltage less than specified means it is weak.
5. Turn Power Off Again
Never leave wires exposed with power on. Turn off the power again right after testing.
6. Test For Continuity
Disconnect voting wires, then set the multimeter to continuity mode. Test each output lead (blue, red, yellow) with the input wires (black, white).
If you discover no continuity, meaning the ballast is open (burned inside).
If the readings are weird or the terminals show shorted, the ballast is damaged.
Special Case: When Only One Lamp Flickers
In a dual-lamp arrangement, one tube flickering or dimming suggests the ballast is beginning to fail.
Exchange tubes across the sockets.
If the problem stays with the same socket, then it is not the bulb; it is either the ballast or wiring.
Troubleshooting Magnetic Vs. Electronic Ballast
| Problem | Magnetic Ballast | Electronic Ballast |
|---|---|---|
| Buzzing sound | Very common | Rare |
| Delayed start | Normal (for magnetic) | Sign of failure |
| Heat buildup | Can get hot | Should stay cool |
| Flickering | Often visible | Usually eliminated |
| No output | Failed capacitor/coil | Blown circuit or driver chip |
When To Repair Or Replace
Repair? Mostly no. Ballasts never were made to be repaired.
They come sealed, and once internal components set on failing, it becomes an unsafe option to repair.
Replace it when:
● It doesn't pass continuity or voltage test
● When there are signs of physical damage or swelling
● More than 10–15 years old
If switching to LED (bypass could be considered).
Safety Reminders
● Always switch off the power before opening any light fixture
● Cap any wires that are not being used, whether testing or replacing
● Wear insulated gloves if working in a tight metal fixture
● Never mix magnetic ballasts with electronic lamps and vice versa
Quick Troubleshooting Reference Table
| Issue | Most Likely Cause | Fix |
|---|---|---|
| Light flickers | Weak ballast or bad tube | Test ballast, replace if needed |
| Lamp won’t start | Dead ballast or wrong wiring | Check voltage, wiring, tube type |
| Humming noise | Magnetic ballast aging | Replace with electronic ballast |
| Lamps dim over time | Low output ballast | Replace with matching ballast |
| Tube won’t fit | Wrong ballast or socket | Check compatibility |
Frequently Asked Questions (FAQs)
Wait! Do LED Bulbs Use Ballasts?
If an LED is compatible with a ballast, then it can be used with one. Otherwise, you have to bypass the ballast.
How to Tell the Type of Ballast Installed: Magnetic or Electronic?
Magnetic ones are large and heavy, and they often hum.
The electronic ballast is smaller in size and does not make a humming noise; it is usually labeled as such.
What Happens When A Ballast Fails?
They gravity light, dim, and sometimes refuse to turn on.
You may also hear a buzzing noise or observe blackened sockets.
Is Bypassing The Ballast Safe?
Yes, if done correctly.
If unsure, follow instructions carefully, or hire a licensed electrician.
Does LED Need A Ballast?
Not really. Most LEDs have their own drivers and even function better without a ballast.
이전 게시물What Is Electricity?
다음 게시물The Complete Guide To Screwdrivers: Types, Sizes, Uses, And Best Sets
유사 상품
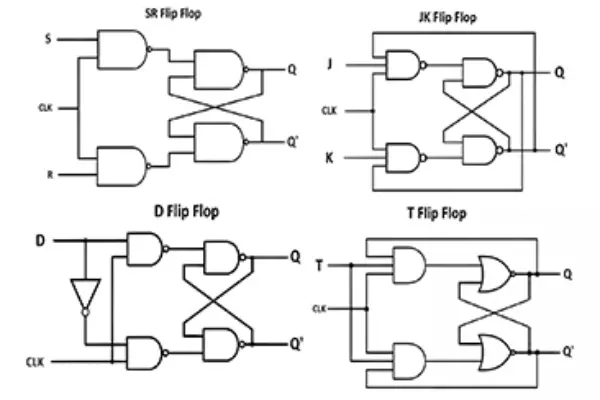
Flip-flops are digital circuits that sto..

Sensors detect changes in the environmen..

Oscillators are circuits that generate r..

Thermopiles are sensors that convert hea..

CR123 and CR123A batteries are the same ..

The L1154F is an alkaline button cell, s..
인기

Telephone cables (RJ11) connect landline..

AG10 battery equivalents include 189, LR..

Battery testers check battery health by ..

Switch poles control how many circuits a..

Learn how to strip a wire safely and eff..